
Student Groups
ASSISTments Student Groups User Guide
Student Groups support targeted instruction and organized analysis of student data. Students can belong to more than one group, making it easy to assign work and review student data in meaningful ways.
Watch the Using Student Groups in ASSISTments video for a quick walkthrough, or follow the steps below to get started.
Create Student Groups
- Select the Assignments icon on the Class Card to create Student Group(s) for that class.
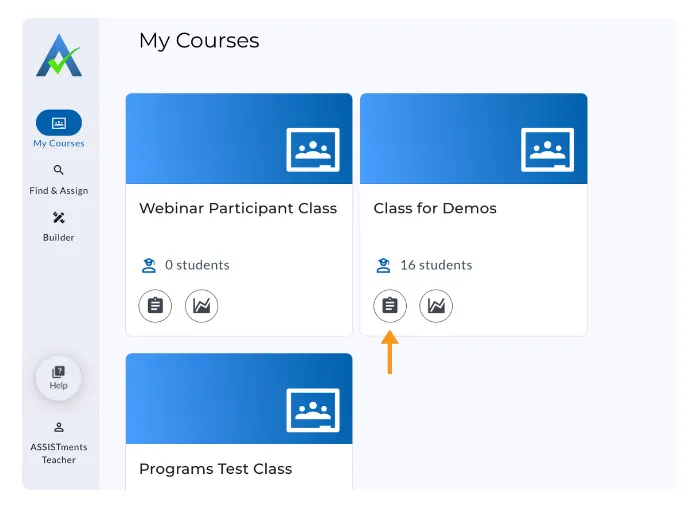
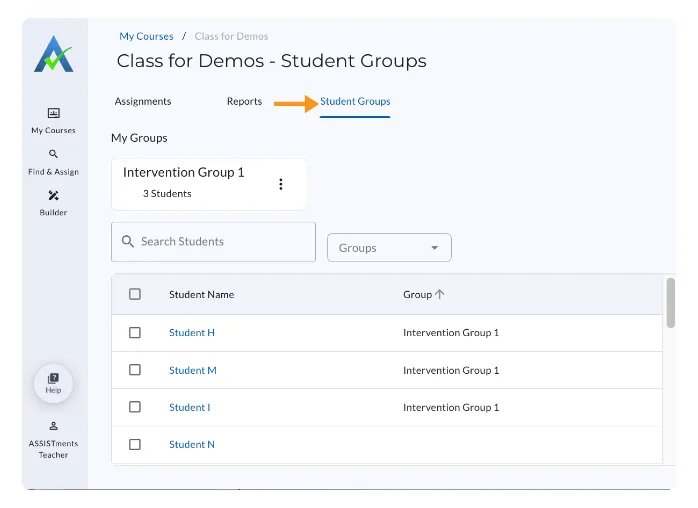
- Select the Student Groups tab.
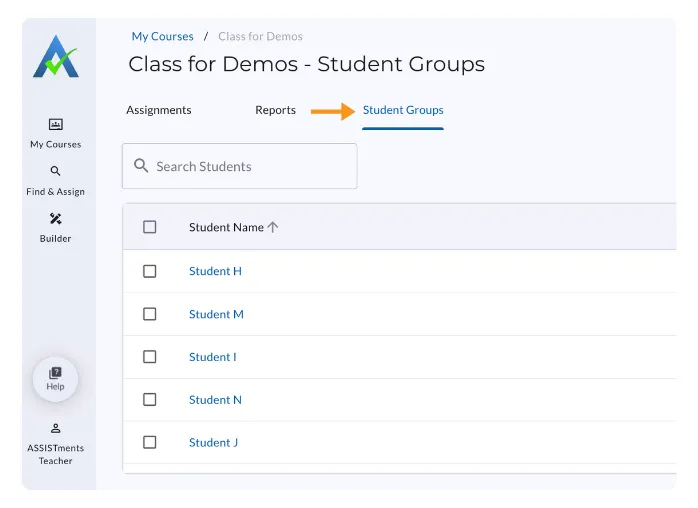
- From the table, select students by:
- Scrolling through the list, or
- Searching by student name
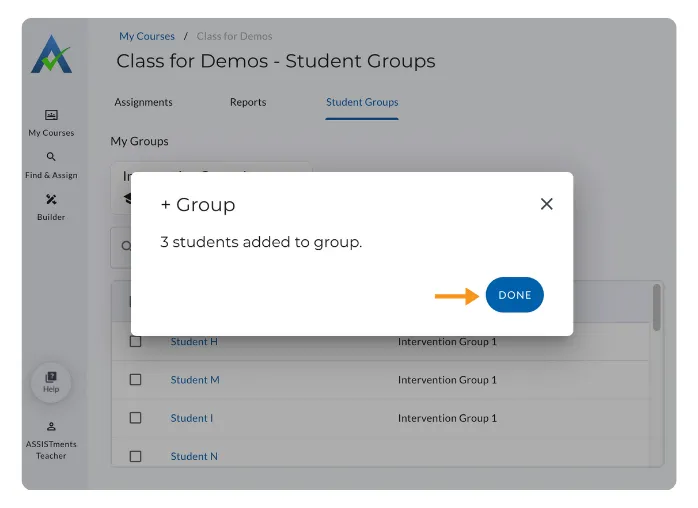
Once students are selected, the ‘+ Group’ button appears.
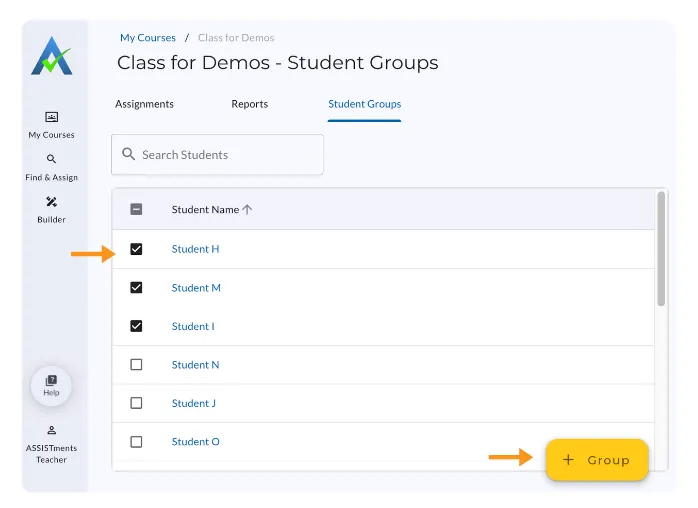
- Click ‘+ Group’.
- Enter the name for your Student Group and select ‘Save to group’.
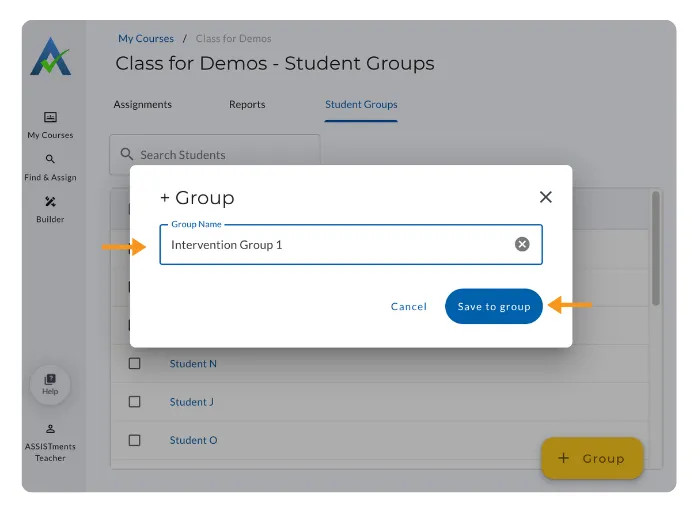
- Select ‘Done’ to successfully create your Student Group.
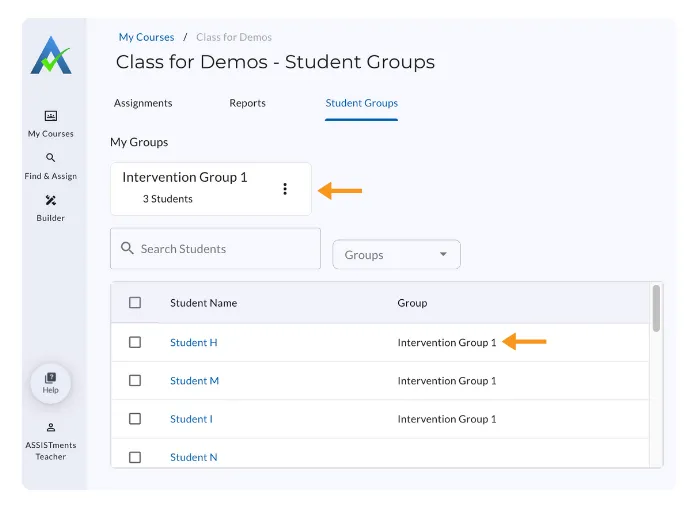
The Student Group will appear under My Groups as a group card. Students added to a group will also have the name of the Student Group they are a member of listed under the Group column of the table.
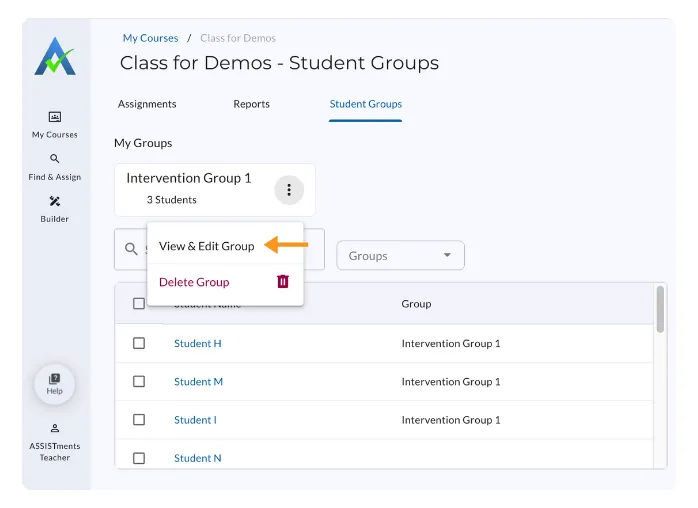
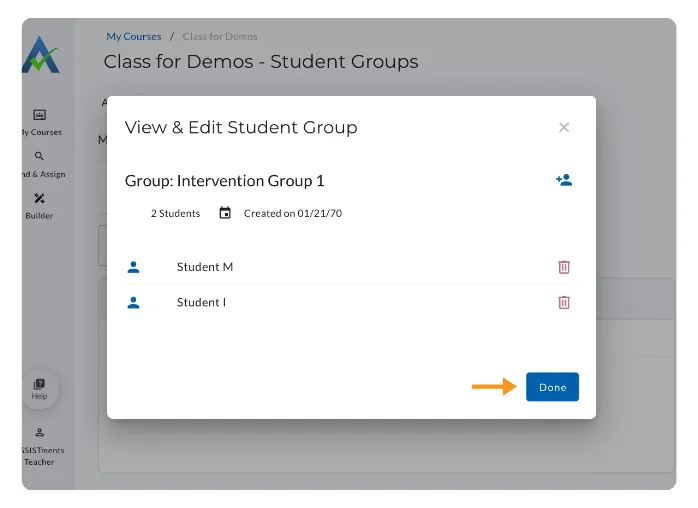
View and Edit Existing Student Groups
You can manage Student Group enrollment at any time.
- Start at the Student Groups Tab.
- Under My Groups, locate the group card and select the triple dots (⫶) on the group card.
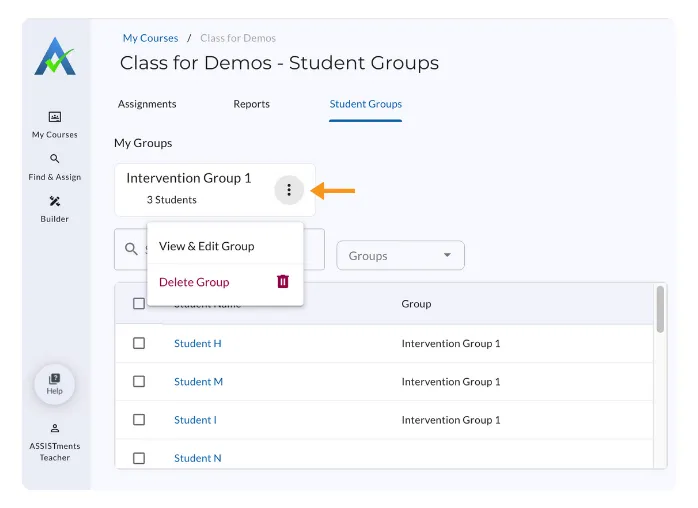
- Click ‘View & Edit’ Group.
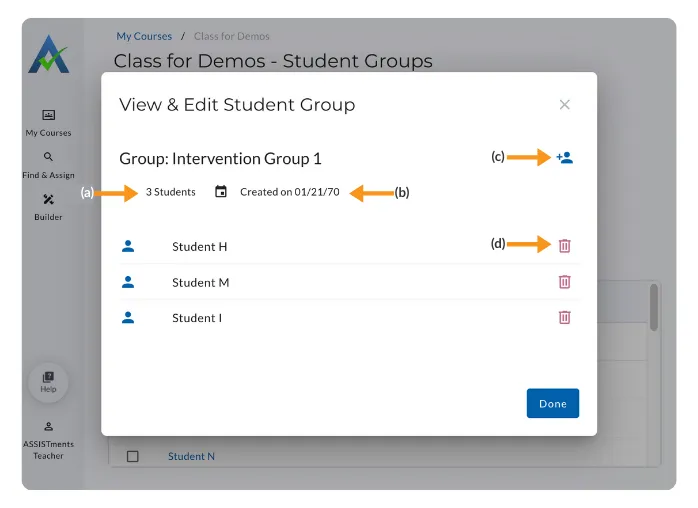
From here, you can:
a) View the number of students in the group
b) See when the group was created
c) Add Students
d) Remove Students
How to Add Students to an Existing Group
- Select the add student icon.
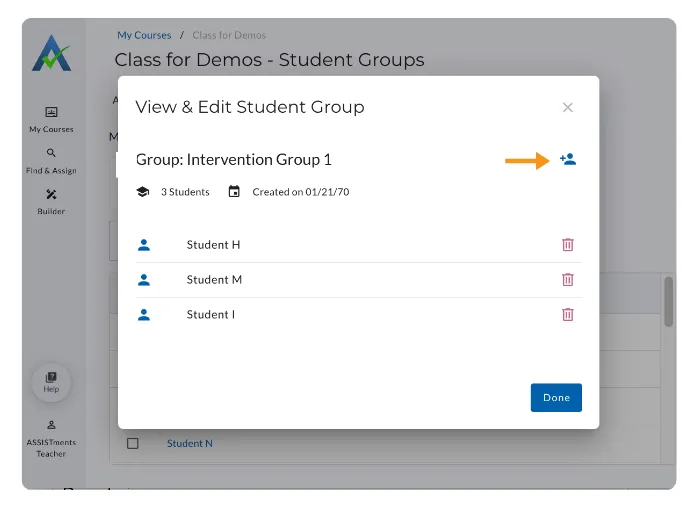
- Begin typing a student’s name in ‘Add More Students’.

- Select the student or students you would like to add
- Once you have selected all the students you would like to add to the group, click ‘Done’.
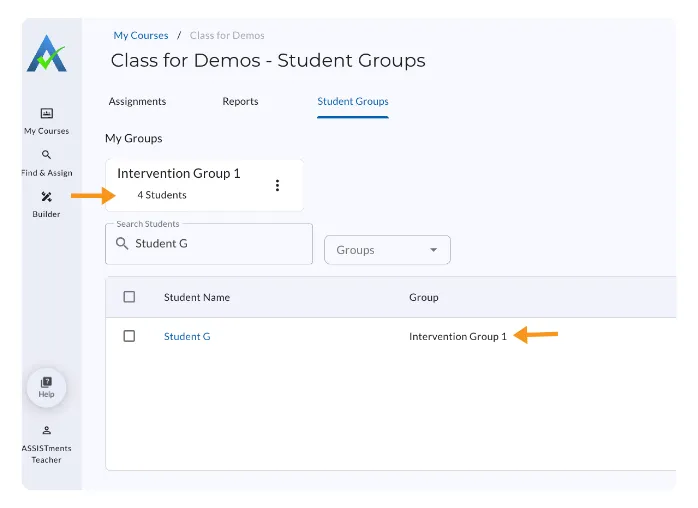
You will know your students have been successfully added to your existing Student Group by the number of students on the group card, or by typing the student's name in the search students and seeing the Student Group Name listed under Groups.
Viewing Student Groups Using the Group Filter
View which students are enrolled in each Student Group at-a-glance.
Note: The Groups Filter only appears after at least one Student Group has been created.
- Locate the Groups Filter on the Student Groups Tab.
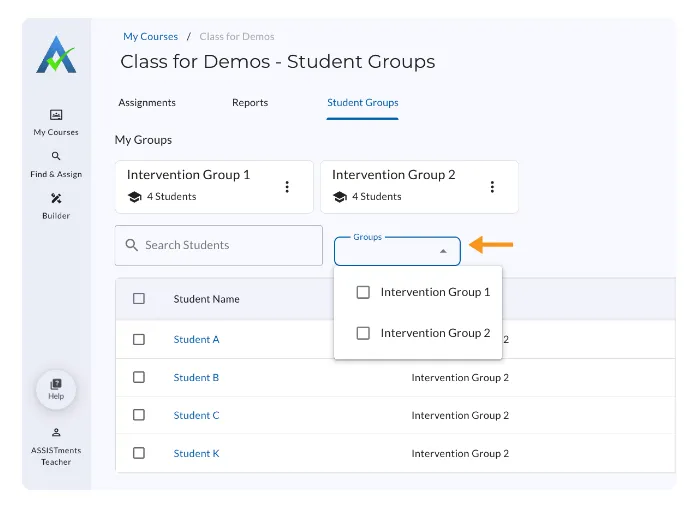
- Select the Student Group(s) you’d like to filter.
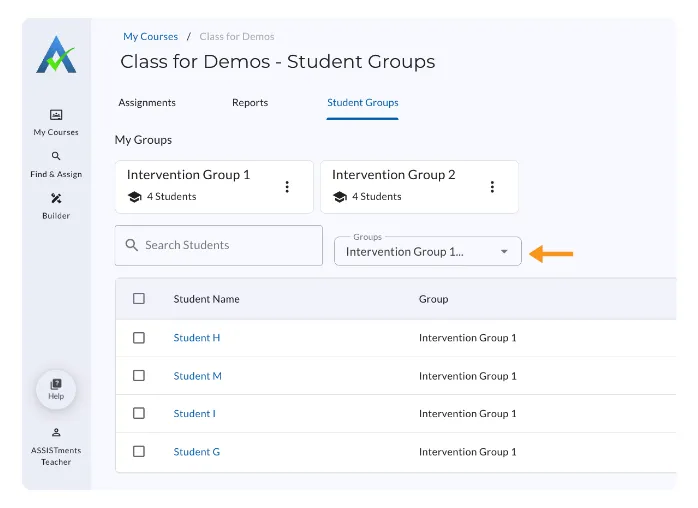
Students enrolled in the selected Student Group(s) are now visible.
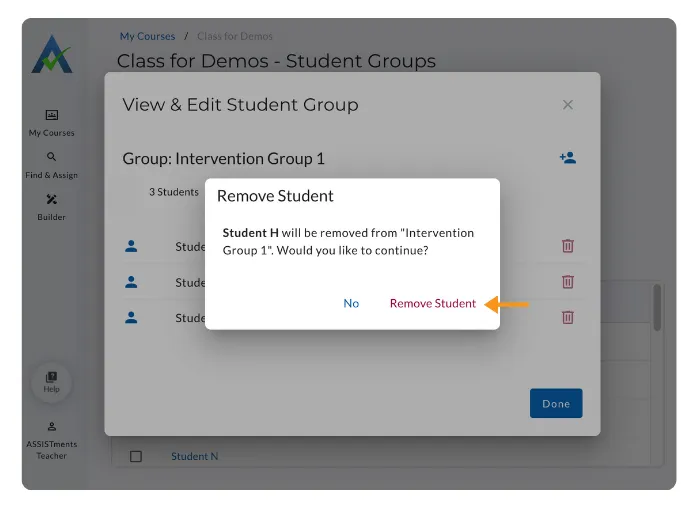
Remove Students from an Existing Student Group
- Under My Groups, select the triple dots (⫶) on the group card and select ‘View & Edit’.
- Select the trash icon to remove the student from that group.

- Confirm that you would like the Student removed from the Student Group.
3. Select ‘Done’ to close the group card, and the student is now removed from the Student Group.
Assign to a Student Group
Teachers can assign to a Student Group in ASSISTments.
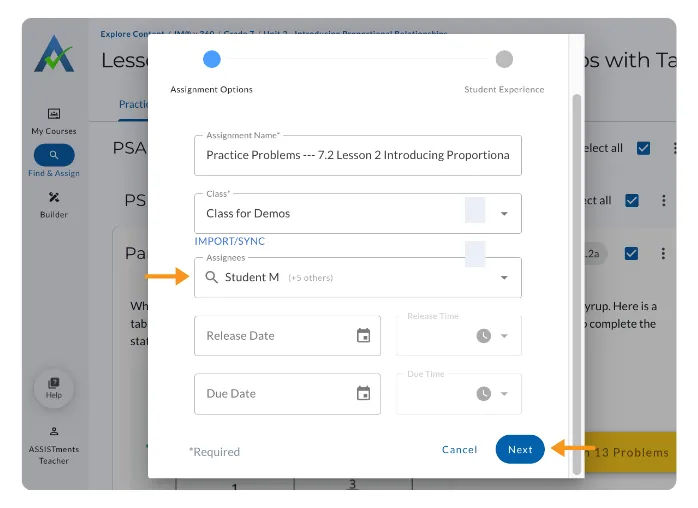
- Choose the content you’d like to assign to your Student Group(s) and select ‘Assign to Class’.
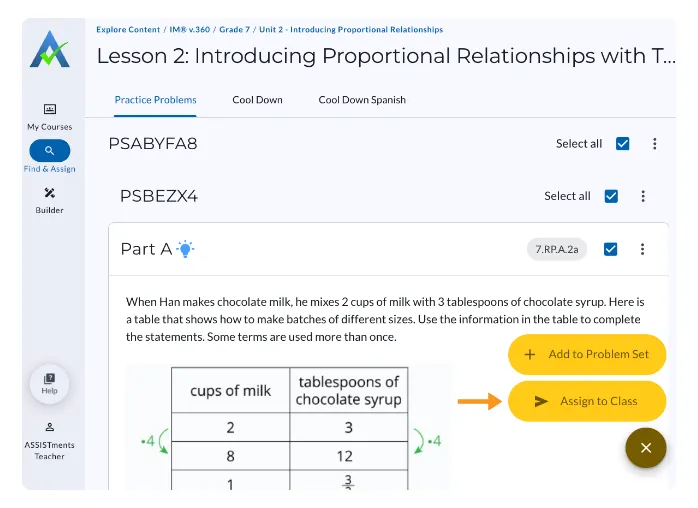
- During Assign Time Options, select the course where the student group was created from the Class Dropdown.
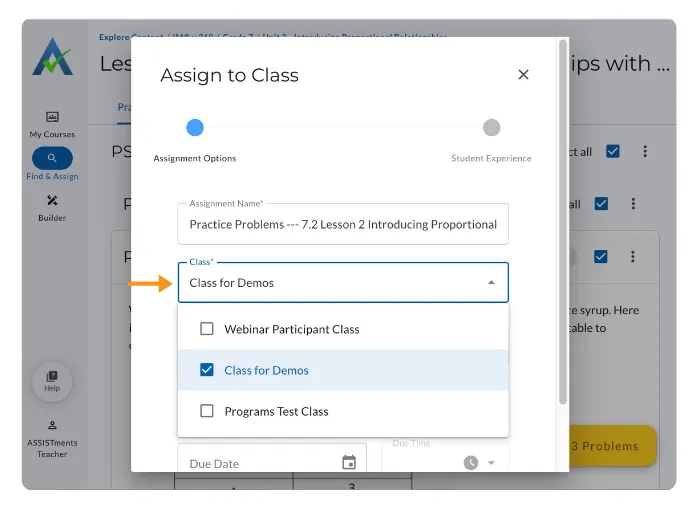
- Important: If you do not select the course that contains the group, the group will not appear in the assignees list.
- Open the Assignees dropdown and unselect ‘All Students’ in the class.
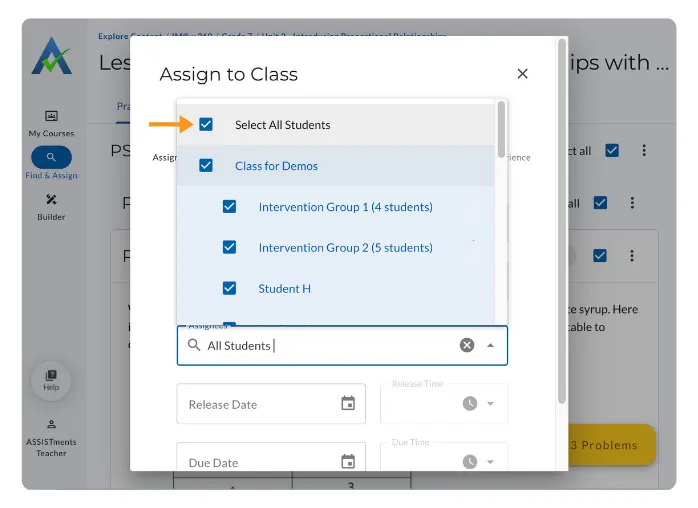
- Check the Student Group(s) to which you want to assign the assignment
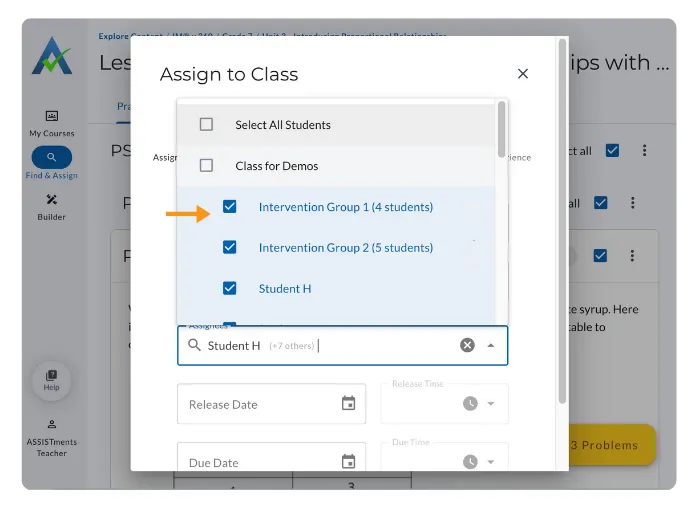
- Confirm your selection and select ‘Next’
Note: The assignees list displays student names, not group names.
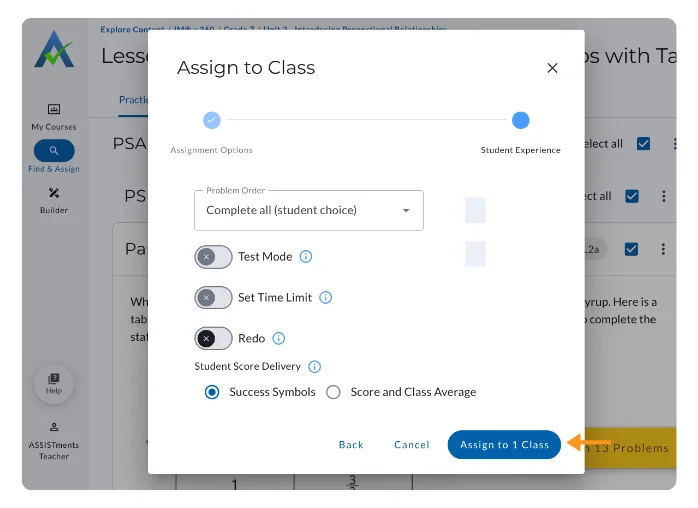
- Review remaining Assign Time Options (learn more here) and select ‘Assign to Class’.
- Select ‘Done’.
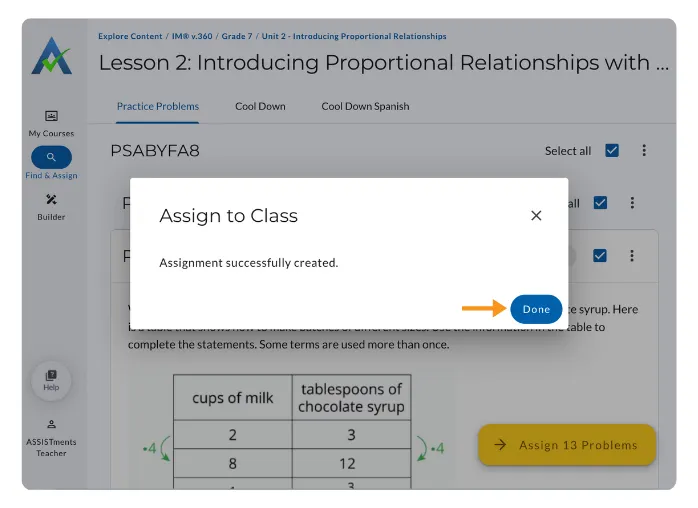
The assignment is now available only to students in the selected group(s).
Viewing Student Group Data
Filtering Student Group Data Within an Assignment Report
Use thiswhen an assignment was assigned to multiple student groups (or the whole class), and you want to focus on one group at a time.
- Select the Assignments icon on the Class Card to access the Assignments List
- Select an assignment from the Assignments List.
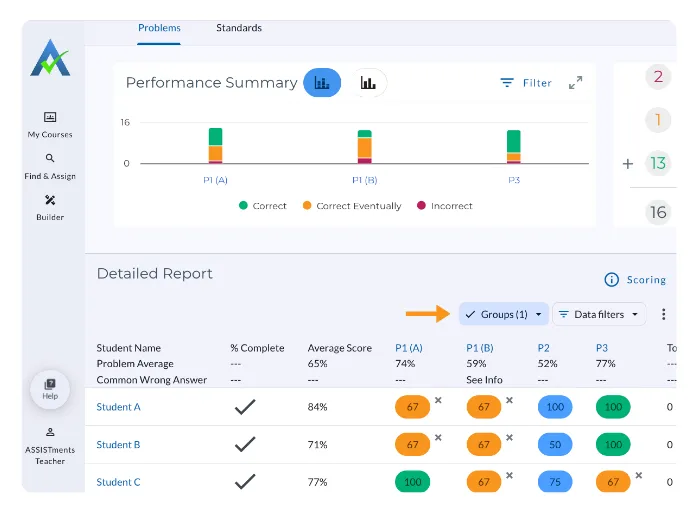
- Locate the Group Filter next to Data Filters.

- Select the dropdown arrow and select the Student Group whose data you want to view.
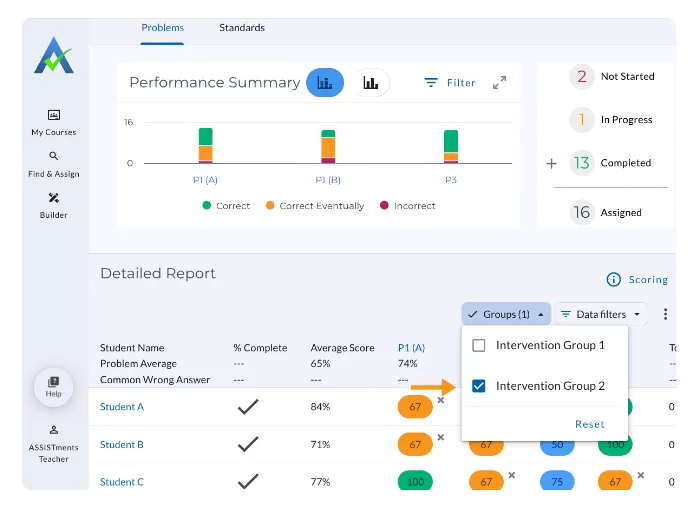
The Assignment Report will update to show assignment report data only for the selected Student Group(s).
Frequently Asked Questions
Q: Can a student be added to more than one group?
A: Yes. Students can belong to multiple groups.
Q: Can I create student groups using students from multiple courses?
A: No, you can only create groups from students enrolled in the course where you create Student Groups.
ASSISTments Student Groups User Guide
Student Groups support targeted instruction and organized analysis of student data. Students can belong to more than one group, making it easy to assign work and review student data in meaningful ways.
Watch the Using Student Groups in ASSISTments video for a quick walkthrough, or follow the steps below to get started.
Create Student Groups
- Select the Assignments icon on the Class Card to create Student Group(s) for that class.
- Select the Student Groups tab.
- From the table, select students by:
- Scrolling through the list, or
- Searching by student name
Once students are selected, the ‘+ Group’ button appears.
- Click ‘+ Group’.
- Enter the name for your Student Group and select ‘Save to group’.
- Select ‘Done’ to successfully create your Student Group.
The Student Group will appear under My Groups as a group card. Students added to a group will also have the name of the Student Group they are a member of listed under the Group column of the table.
View and Edit Existing Student Groups
You can manage Student Group enrollment at any time.
- Start at the Student Groups Tab.
- Under My Groups, locate the group card and select the triple dots (⫶) on the group card.
- Click ‘View & Edit’ Group.
From here, you can:
a) View the number of students in the group
b) See when the group was created
c) Add Students
d) Remove Students
How to Add Students to an Existing Group
- Select the add student icon.
- Begin typing a student’s name in ‘Add More Students’.
- Select the student or students you would like to add
- Once you have selected all the students you would like to add to the group, click ‘Done’.
You will know your students have been successfully added to your existing Student Group by the number of students on the group card, or by typing the student's name in the search students and seeing the Student Group Name listed under Groups.
Viewing Student Groups Using the Group Filter
View which students are enrolled in each Student Group at-a-glance.
Note: The Groups Filter only appears after at least one Student Group has been created.
- Locate the Groups Filter on the Student Groups Tab.
- Select the Student Group(s) you’d like to filter.
Students enrolled in the selected Student Group(s) are now visible.
Remove Students from an Existing Student Group
- Under My Groups, select the triple dots (⫶) on the group card and select ‘View & Edit’.
- Select the trash icon to remove the student from that group.
- Confirm that you would like the Student removed from the Student Group.
3. Select ‘Done’ to close the group card, and the student is now removed from the Student Group.
Assign to a Student Group
Teachers can assign to a Student Group in ASSISTments.
- Choose the content you’d like to assign to your Student Group(s) and select ‘Assign to Class’.
- During Assign Time Options, select the course where the student group was created from the Class Dropdown.
- Important: If you do not select the course that contains the group, the group will not appear in the assignees list.
- Open the Assignees dropdown and unselect ‘All Students’ in the class.
- Check the Student Group(s) to which you want to assign the assignment
- Confirm your selection and select ‘Next’
Note: The assignees list displays student names, not group names.
- Review remaining Assign Time Options (learn more here) and select ‘Assign to Class’.
- Select ‘Done’.
The assignment is now available only to students in the selected group(s).
Viewing Student Group Data
Filtering Student Group Data Within an Assignment Report
Use thiswhen an assignment was assigned to multiple student groups (or the whole class), and you want to focus on one group at a time.
- Select the Assignments icon on the Class Card to access the Assignments List
- Select an assignment from the Assignments List.
- Locate the Group Filter next to Data Filters.
- Select the dropdown arrow and select the Student Group whose data you want to view.
The Assignment Report will update to show assignment report data only for the selected Student Group(s).
Frequently Asked Questions
Q: Can a student be added to more than one group?
A: Yes. Students can belong to multiple groups.
Q: Can I create student groups using students from multiple courses?
A: No, you can only create groups from students enrolled in the course where you create Student Groups.
Didn't Find What You Were Looking For?
.avif)
Charitable Number: 83-4228740