
School Terms
Setting Up School Terms
Use the School Terms feature to create custom date ranges (such as semesters, trimesters, or quarters) in ASSISTments. This feature allows you to easily filter assignments and view student progress reports and class reports by term.
Option 1: Create Terms via Settings
- Log in to your ASSISTments account.
- Click your name in the bottom-left corner.
- Choose Preferences in the left side panel.
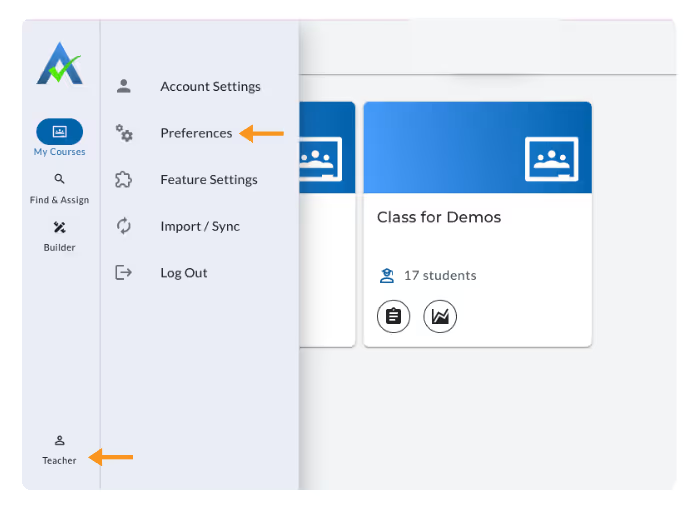
- Scroll down to School Terms
- Click on + ADD TERM in the School Terms section
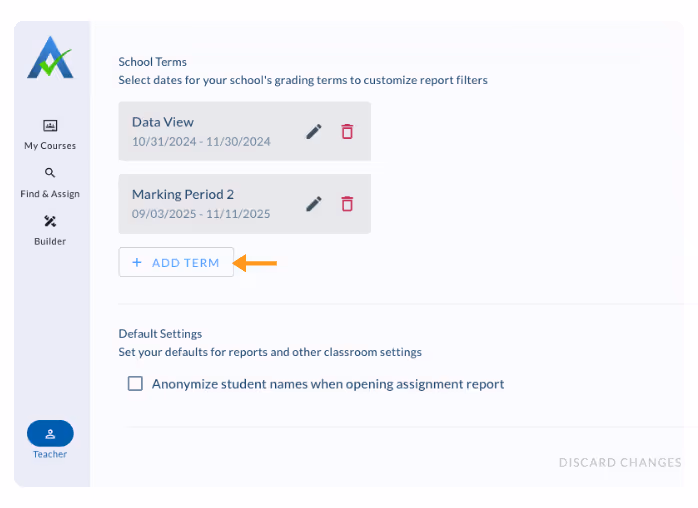
- Enter the Term Name
- Select the Start Date and End Date for the term
- Click Save

- Continue to add terms by selecting “ADD ANOTHER TERM” or select “DONE” to close the window.
Option 2: Create Terms via Assignments
You can create terms via Assignments if none have been created.
Once you’ve created terms, you will need to go through your settings to add additional terms
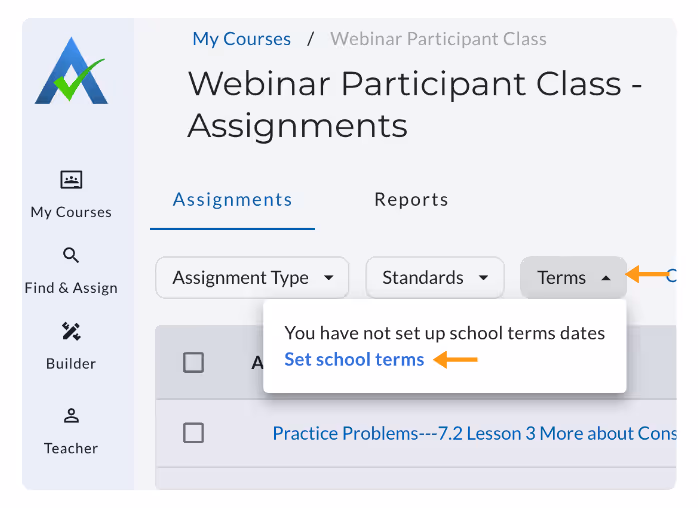
- Click on the Assignments Icon on your Class Card.
- Click on Terms
- Select Set School terms
Utilizing Terms
Once your terms are set up, use them to quickly filter and analyze your data:
FIlter Assignments
- Click on the Assignments Icon on your Class Card.
- Locate the Terms dropdown.
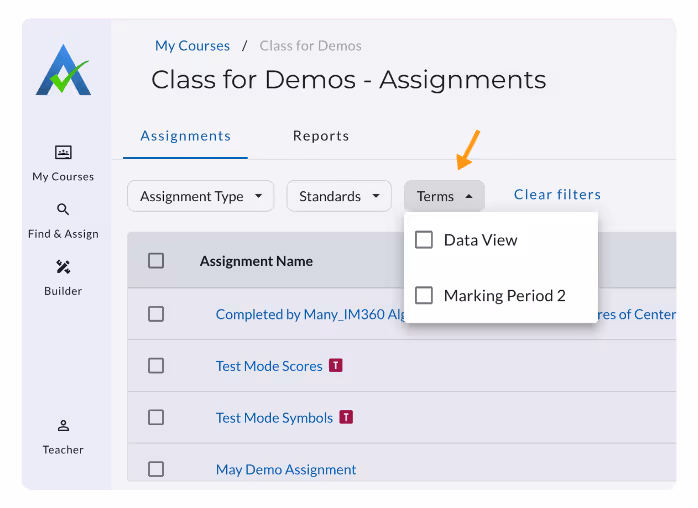
- Select a term to display only assignments from that date range.
FIlter Reports
- Select Class Report or Student Report.
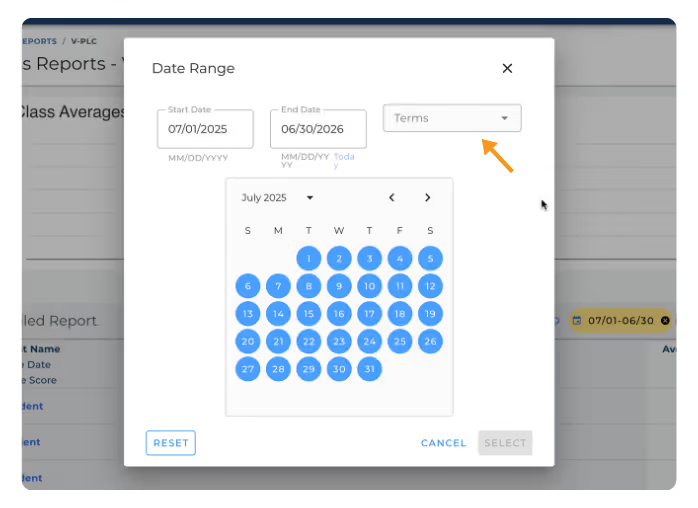
- Click on the yellow date selector.
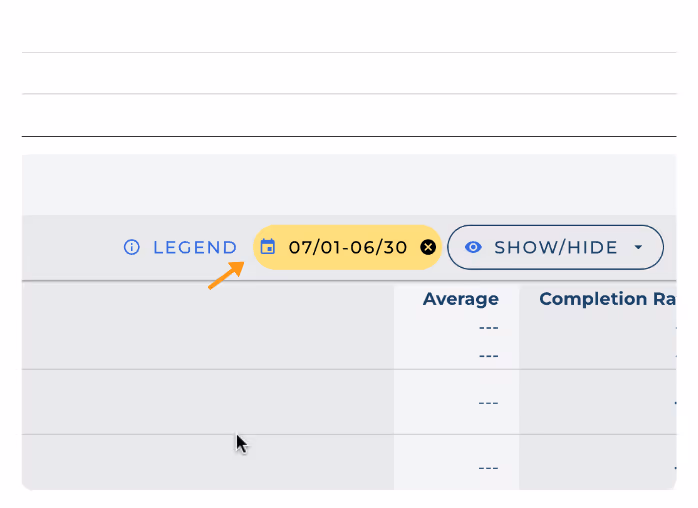
- Select the term to display only assignments from that date range.
Troubleshooting Tips
- Problem: Don’t see terms as an option to filter assignments or reports
- Solution: Make sure you’ve created at least one term.
- Problem: I created a school term by mistake
- Solution: In your teacher account, go to settings > preferences > school terms and locate the term you would like to remove. Select the trash icon next to the term. Confirm the deletion when prompted.
Setting Up School Terms
Use the School Terms feature to create custom date ranges (such as semesters, trimesters, or quarters) in ASSISTments. This feature allows you to easily filter assignments and view student progress reports and class reports by term.
Option 1: Create Terms via Settings
- Log in to your ASSISTments account.
- Click your name in the bottom-left corner.
- Choose Preferences in the left side panel.
- Scroll down to School Terms
- Click on + ADD TERM in the School Terms section
- Enter the Term Name
- Select the Start Date and End Date for the term
- Click Save
- Continue to add terms by selecting “ADD ANOTHER TERM” or select “DONE” to close the window.
Option 2: Create Terms via Assignments
You can create terms via Assignments if none have been created.
Once you’ve created terms, you will need to go through your settings to add additional terms
- Click on the Assignments Icon on your Class Card.
- Click on Terms
- Select Set School terms
Utilizing Terms
Once your terms are set up, use them to quickly filter and analyze your data:
FIlter Assignments
- Click on the Assignments Icon on your Class Card.
- Locate the Terms dropdown.
- Select a term to display only assignments from that date range.
FIlter Reports
- Select Class Report or Student Report.
- Click on the yellow date selector.
- Select the term to display only assignments from that date range.
Troubleshooting Tips
- Problem: Don’t see terms as an option to filter assignments or reports
- Solution: Make sure you’ve created at least one term.
- Problem: I created a school term by mistake
- Solution: In your teacher account, go to settings > preferences > school terms and locate the term you would like to remove. Select the trash icon next to the term. Confirm the deletion when prompted.
Didn't Find What You Were Looking For?
.avif)
Charitable Number: 83-4228740